Motorcycle Brake Inspection at Home: Pads, Fluid, Rotors, and When to Replace
Brakes wear slowly enough that you stop noticing. A ten-minute check with a flashlight tells you what's left, what the fluid's doing, and whether the rotors are still in spec.
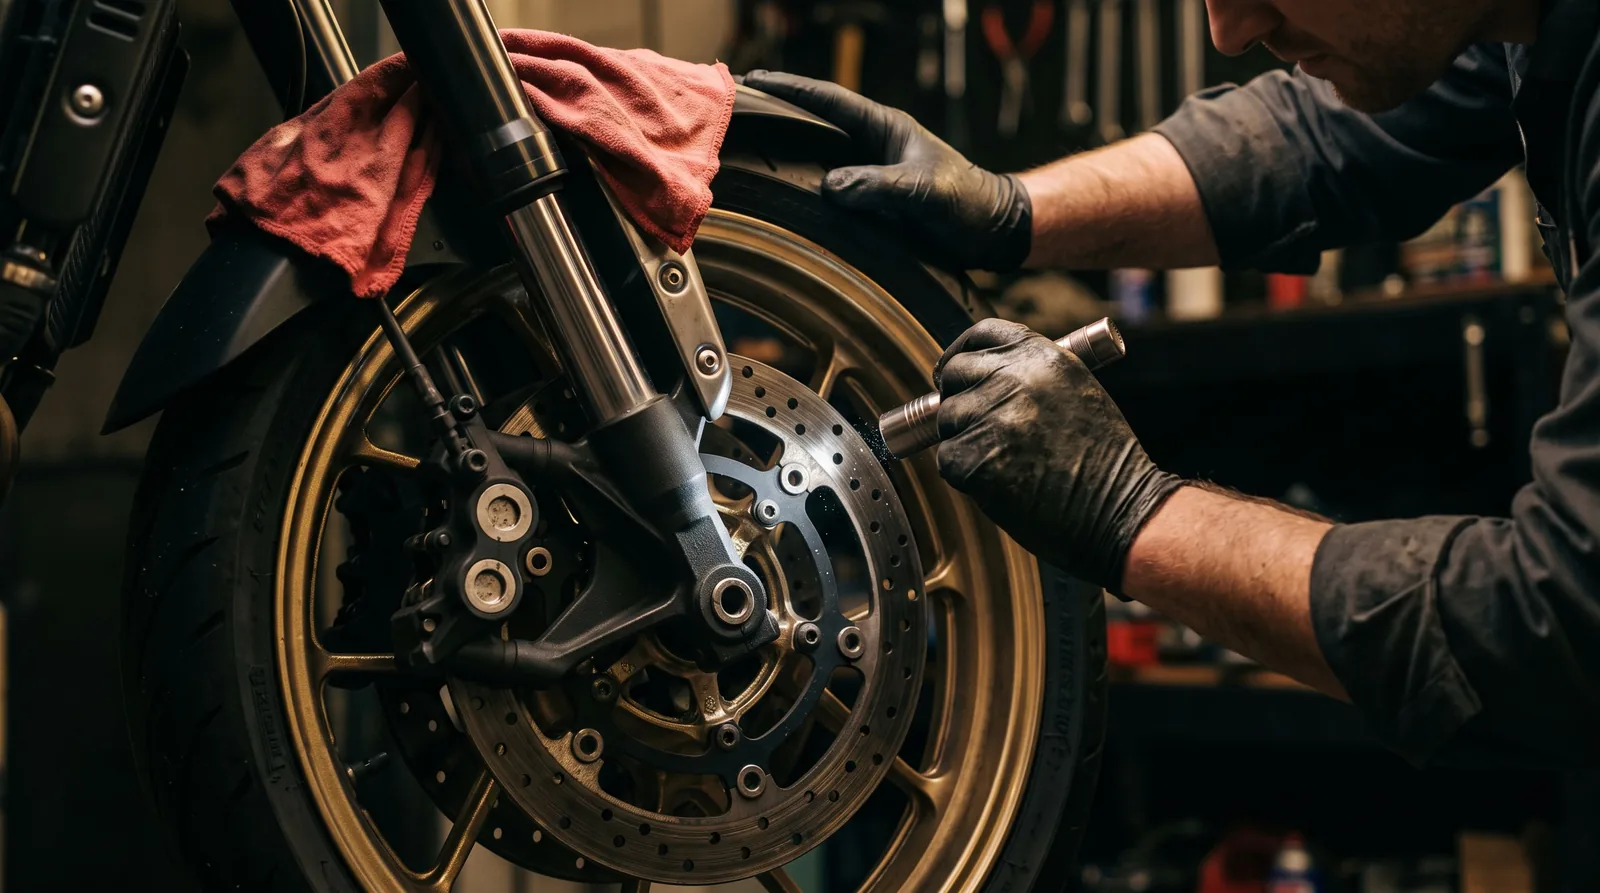
Brakes don't fail suddenly. They fade, a little at a time, over thousands of miles, and because it's gradual you adjust without noticing. Then someone else rides your bike and asks why the lever comes back to the bar.
This is the ten-minute check. Do it every oil change, or every 3,000 miles, and before any long trip. You need a flashlight, a rag, and maybe a small mirror.
1. Look at the pads
Most calipers let you see the pads without removing anything. Get the flashlight on the caliper from behind or below and find the pad material pressed against the rotor on each side.
What you're measuring: the thickness of the friction material, not the metal backing plate it's bonded to.
| Pad material left | What to do |
|---|---|
| 4 mm or more | Fine. Log it and move on. |
| 2–3 mm | Order pads. Replace at the next service. |
| Under 2 mm | Replace now. Most manufacturers' wear limit is 1.5–2 mm. |
| Wear groove gone | Replace now. Many pads have a slot cut in the material; when it disappears, the pad is at its limit. |
Check both pads in each caliper. The inboard and outboard pads often wear unevenly, and a sticky caliper piston shows up first as one pad much thinner than the other.
Can't see them? Pull the wheel or the caliper. On most bikes it's two bolts. A caliper hanging on its hose for five minutes is fine; just don't squeeze the lever while it's off.
2. Check the fluid
Find the reservoir, front on the handlebar, rear usually under a side panel. Look at the sight glass or open the cap with the bars level.
Level. Between the min and max marks. A low level with no leak usually means the pads are worn: as pads wear, the pistons sit further out and the fluid moves into the caliper. Topping up a low reservoir without checking the pads hides the warning.
Color. New brake fluid is clear to pale yellow. Amber is aging. Brown or black is overdue. Brake fluid absorbs water from the air over time, and water lowers its boiling point. In a hard stop on a long descent, old fluid can boil, and a lever that goes to the bar on the way down a mountain is not a lesson anyone wants.
Change interval: every two years regardless of mileage, DOT 4 unless your bike specifies otherwise. Log the date on the cap with a paint pen if you want; log it in your garage either way.
3. Check the rotors
Run a fingernail from the center of the rotor out to the edge. You'll feel the lip where the pads haven't worn. A small lip is normal. A deep one means the rotor is approaching its minimum thickness, which is stamped on the rotor itself (look for "MIN TH" and a number like 4.5 mm). Measure with calipers if you have them.
Also look for:
- Heat discoloration. Blue or straw-colored patches mean the rotor got very hot. Once is a story. Repeatedly means something's dragging.
- Scoring. Deep grooves usually mean a pad wore to the backing plate at some point. The rotor may be salvageable, but check thickness.
- Warping. A pulse in the lever under braking. Rotors can be measured for runout with a dial gauge; realistically, a pulsing lever on a bike with a worn rotor means a new rotor.
4. Squeeze, and listen
With the bike stationary, squeeze the front lever hard. It should go firm and stay there. If it creeps toward the bar while you hold it, there's air in the system or a master cylinder seal is going. If it's spongy from the start, bleed the brakes.
Push the bike forward and apply each brake. It should bite cleanly and release fully. A brake that drags after release, or a wheel that doesn't spin freely, points to a sticking caliper piston or a swollen hose. Both are cheap to fix and expensive to ignore.
Now the sounds. A light scrape at low speed on a cold morning is often just surface rust being wiped off and goes away in a few stops. A squeal under braking is glazed pads or missing anti-squeal shims. A grinding, metal-on-metal noise means the pad is gone and the backing plate is eating the rotor. Stop riding.
5. Lines and hardware
Follow each brake line from the master cylinder to the caliper. Look for cracks, bulges, wet spots, or chafing where the line passes the forks or swingarm. Rubber lines are usually rated for about four years; braided steel lines last much longer. Check the banjo bolts for weeping.
Make sure the caliper mounting bolts are tight and the pad retaining pins are in place. It takes ten seconds and it's the kind of thing that only matters once.
Replacing pads yourself
It's one of the more approachable jobs on a bike: remove the caliper, push the pistons back (gently, with the reservoir cap off and a rag around it so fluid doesn't overflow), swap the pads, reassemble, pump the lever until it's firm, then bed the pads in with a dozen gentle stops before any hard braking.
If you're not sure, a shop will do it in under an hour. There's no prize for doing your own brakes; there's only a prize for having brakes that work.
What to log
- Pad thickness, front and rear, with the date and mileage
- Fluid change date
- Rotor thickness if you measured it
- Any drag, pulse, noise, or leak you noticed
Two inspections six months apart give you a wear rate, and a wear rate tells you when the next set is due before the pad tells you with a noise. The maintenance schedule puts brakes alongside everything else that's due; the pre-ride inspection covers the quick version you do before every ride.
Common questions
How long do motorcycle brake pads last?
Anywhere from 10,000 to 30,000 miles for the front, often longer for the rear. Sintered pads outlast organic ones but are harder on rotors. Riding style matters more than the pad; a commuter in traffic goes through pads twice as fast as a weekend rider on open roads.
Can I just top up the brake fluid?
If the level is low because the pads are worn, no; replace the pads and the level comes back. If the level is low and the pads are fine, you have a leak, and topping up only delays finding it.
My lever pulses. Is that warped rotors?
Usually, yes. Sometimes it's uneven pad deposits that can be cleaned up by bedding the pads in again. If it persists, measure the rotor runout or replace the rotor.
Is it safe to ride with pads at 2 mm?
To the shop, yes. On a trip, no. At 2 mm you have very little heat capacity left, and the first long descent will use it up.
Keep reading
 Maintenance & Repairs · 5 min
Motorcycle Tires: Pressure, Wear Bars, Date Codes, and When to Replace
Two patches of rubber the size of your palm are all that touch the road. Here's how to check pressure the right way, read the wear bars and
 Maintenance & Repairs · 5 min
Motorcycle Battery Maintenance: Tenders, Voltage, and How Long One Lasts
The battery is the part that fails on the first ride of the season. Here's what the voltage numbers mean, which charger to use, how to store
 Maintenance & Repairs · 6 min
How to Winterize a Motorcycle: The Checklist That Wakes Up Ready
Fuel, battery, tires, chain, fluids, cover. Nine steps, an afternoon's work, and a machine that starts on the first warm Saturday instead of