
Winter storage done right means your bike wakes up in spring exactly as you left it — ready to ride. Done wrong, you’ll be fighting a gummed-up carb, a dead battery, flat-spotted tires, and a demoralized attitude before the season even starts.
Here’s how to do it right.
Step 1: Do a Final Oil Change
Used oil contains combustion byproducts and acidic compounds that will sit in your engine all winter and slowly corrode internal components. Change the oil and filter before storage, not in spring. Fresh oil protects the engine during hibernation.
Step 2: Treat the Fuel
Modern gasoline (especially ethanol-blended fuel) degrades in as little as 30 days. Over a storage period, it oxidizes, leaves varnish deposits, and can gum up your injectors, carb jets, or fuel pump screen.
Option A — Fuel stabilizer: Add a fuel stabilizer (Sta-Bil or similar) to a full tank of fresh fuel. Run the engine for 5–10 minutes to cycle the treated fuel through the entire system. A full tank also reduces the air space where condensation can form.
Option B — Empty the system: For carbureted bikes, some riders prefer to drain the tank and carb bowl completely. This works, but requires careful reassembly in spring and leaves metal surfaces unprotected.
For fuel-injected bikes with modern sealed systems, stabilizer is the cleaner, safer choice.
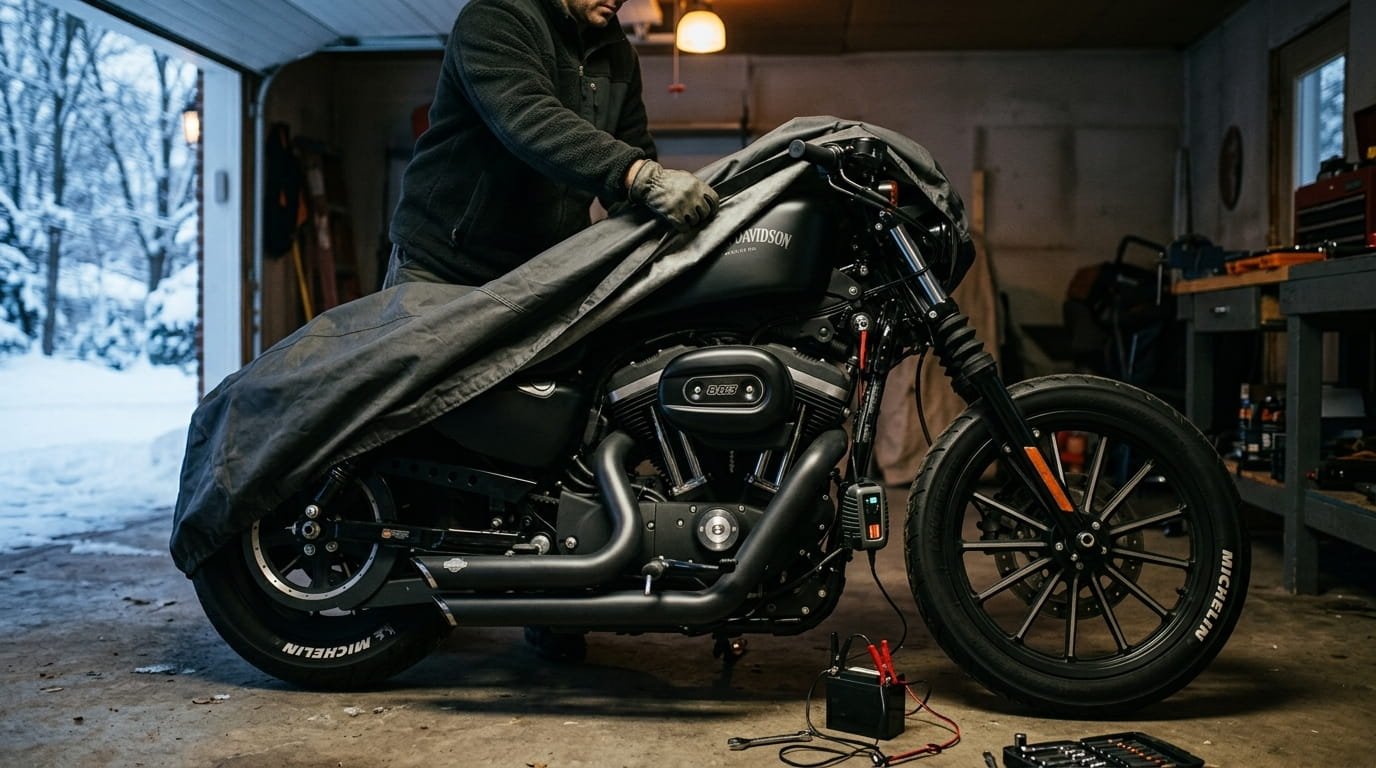
Step 3: Handle the Battery
Leaving a battery connected and sitting for months will kill it. Cold temperatures accelerate sulfation, which permanently reduces capacity.
Best approach: Remove the battery, bring it inside, and connect it to a battery tender (not a trickle charger — a smart tender that monitors and maintains voltage). Leave it on all winter. You’ll pull it off in spring and have a fully charged battery ready to go.
If you can’t use a tender, at minimum remove the battery and store it in a cool, dry place. Check the charge monthly and top it up as needed.
Step 4: Protect the Engine Cylinders
This step is optional but worth doing for long storage periods (4+ months). Remove the spark plug(s), squirt a tablespoon of clean engine oil into each cylinder, and slowly turn the engine over by hand (or with the starter briefly, ignition off) to coat the cylinder walls. Reinstall the plugs. This prevents rust on the cylinder walls during storage.
Step 5: Tires and Suspension
Tires sitting on a hard floor under a heavy bike develop flat spots — especially in cold temperatures. Solutions:
- Use a paddock stand to lift both wheels off the ground (best option)
- Place the bike on a piece of carpet or foam mat to reduce contact pressure
- Slightly over-inflate tires by 5 PSI to help maintain shape
- Move the bike forward or backward a few inches every few weeks if it’s sitting on its tires
Also compress and release the forks and rear shock a few times before storage to ensure they’re not sitting at full extension for months.
Step 6: Protect the Exterior
- Clean the bike thoroughly — dirt and moisture left on surfaces corrode chrome and paint over winter
- Apply a light coat of wax to painted surfaces
- Apply a corrosion inhibitor (like ACF-50 or CorrosionX) to exposed metal, frame, and fasteners
- Use a breathable motorcycle cover — not a plastic tarp, which traps moisture
- Plug the exhaust outlet(s) with a rag to keep rodents and moisture out
The Spring Checklist
When it’s time to ride again, don’t just fire it up and go:
- Install the charged battery
- Remove the exhaust plug(s)
- Check tire pressure and inspect for cracking
- Check all fluid levels (oil, coolant, brake fluid)
- Inspect chain tension and lubrication
- Test all lights and controls
- Let the engine warm up fully before riding hard
Keep the Record
Log your winter storage prep in Moto Frontier — what you did, when you did it, and what needs attention in spring. Your future self will thank you when you pull the bike out in March and already know exactly where it stands.
Prep it right. Wake it up right. Then ride.